I hope everyone is having a wonderful Christmas week. We are 4 days out and my inner child is *slightly* freaking out. Nothing beats waking up Christmas morning and unwrapping presents, eating french toast casserole, and spending the day snuggled in front of the fire.
Today, I’m throwing us back to before Thanksgiving, back to when I had my roof installed. Yes. My beautiful house has a beautiful roof, and she is sooo nice.
As many of ya’ll know, I decided to install a black metal roof for multiple reasons
Metal roofs are known for their durability. I don’t have the largest income, and didn’t want to worry about roof repairs and leaks down the road. They don’t corrode or crack, and per warranty you’re guaranteed 50-70 years without issues. Not that I’ll be living here for 30 years or anything, but I will be living here worry free about roof leaks.
They are more environmentally friendly – although asphalt shingles are being recycled more, a metal roof provides a flat, stable platform for homeowners who want to install rooftop solar panels, and collect rainwater. I want to do both.
Metal roofs are VERY energy efficient – even though I’ll be installing a mini split system for heating/cooling which is a pretty efficient system in itself, a solar heat reflecting roof will also help. During the summer, metal roofs are proven to reduce cooling costs by 25% – and as a girl who keeps her home at 68 degrees, I know my wallet will appreciate a reduced bill.
Plus they look nice and I’m a sucker for a nice looking anything
Although metal roofs are much more expensive than asphalt shingles, I’m blessed with a tiny roof. I’m finding I can afford nicer things when I don’t have much to buy in the first place, tiny home perk!
So with my decision made, dad and I purchased the roof and brought her home 3 days later. Driving in the truck with 4ft of metal hanging off was probably not the best decision, but I’m also cheap when it comes to a $150 delivery fee for a 15minute drive. Ridiculous right?!
The edging trim pieces
So. With metal in hand I set to work finding someone who could install it for us. Dad and I are both scared of heights and the roof is about 20ft in the air, not to mention we have no way of getting up there, so I put an ad out on Facebook Marketplace. I received several inquiries almost immediately, and after having two people out for quotes, I hired Derek Ritter out of Brookfield, MO. Although he was two hours away, he was more than willing to do the job, and he had availabilities for that same weekend!
A day later, my roof was installed. She is black and bold, and although you can’t see much of her from the ground, I had Derek take a picture when he was up there. Doesn’t she look nice?!
I was worried we would be able to see the silver screws, but they were black as well! Score!
Now the building is *almost* waterproofed for winter, it looks great, and dad and I didn’t have to face our fear of falling off a roof to our deaths 😂😂
Anyways, thanks to everyone for sticking around. This has been quite the extensive journey, and a lot hasn’t gone according to plan, (safe to say I’m more than looking forward to working inside the house, that’s moreso where dad and I thrive) but I am looking forward to sharing the almost last bit of exterior work with you guys later this week!
I hope everyone ate until they had to unbutton the top button, surrounded themselves with family and friends, and expressed their thankfulness, in one way or another. I know I did. Although Thanksgiving looked a bit different this year with Covid keeping extended family in their respective homes, we were able to celebrate with my older sister and her boyfriend Adam. We always have such a good time cooking, eating, drinking and playing together. I find myself pausing in those moments, so thankful we all live relatively close to each other, able to enjoy each other’s company for days on end.
I wanted to finish out this wonderful Thanksgiving weekend with a blog post; when thinking of all the topics I plan to cover and where to even begin, painting my vinyl windows seems to be at the front – a fun, controversial subject. I myself am a lover of controversy, so this should be fun!
Back in July, I started researching what kind of windows I needed; their dimensions, placement locations, and any available colors. I knew I wanted black exterior windows, and that I needed 7 windows in total, and roughly where they were to be hung. Once I had figured out what was what, I was able to purchase my windows from MidCity Lumber , a local construction and building materials store here in Columbia. MidCity is known for their competitive pricing – for example, my 6x3ft window at Menards was $345. At MidCity, my total was $222. Being able to save so much per window really helped me save a lot, but even still, my total window price was $1200. Thankfully, dad has an account with MidCity, so I was able to put the window purchase on credit, and I am making payments on it every month.
If you’re interested, these are the exact window details 🙂
One 6×3, sliding
Kitchen
$222.35
One 3×4, sliding
Living Room
$183
One 2×4, sliding
Bathroom
$153
Two 4×2, picture
Upper Open Space
$270
Two 4×2, sliding
Lofted Bedroom
$318
Please keep in mind window prices vary greatly, these are the prices I paid for Quaker brand windows at my local construction supply store
With windows purchased and delivered, I then set to work researching vinyl safe paints, along with the pro’s/con’s of painting windows.
Vinyl safe paints were hard to come by; most everyone is aware of the Sherwin Williams vinyl safe paint line, however, they don’t offer black pigments. That’s because vinyl flexes under heat and painting with a dark color can cause it to absorb even more heat and possibly crack/chip off. Also, painting vinyl is a tricky business in itself, and you can’t just buy regular exterior paint. Since vinyl is flexible and slick and weird – paint doesn’t want to stick to it. Vinyl is created from PVC, the same material used for gutters and pipes, and is verrrry fluid resistant. The only chance of having your exterior paint stick to the vinyl is if you get an acrylic based, or urethane-modified acrylic based paint. Acrylics are more likely to stick to the slick surface without cracking or chipping.
Also, painting vinyl is one thing. Painting vinyl windows is a whole nother business in itself. Paint manufacturers (like the dudes behind the Sherman Williams vinyl safe paint line) will tell you yes, you can paint vinyl windows. You can paint anything, right? Well, right, except there is a different between can and should. Still with me?
So the paint guys over at the paint counter will tell you you can paint vinyl windows. However, the bros over at the window counter will strongly recommend you don’t, and for some pretty serious reasons. Painting your windows can void your home and window warranty, your windows have a higher chance of absorbing heat and shattering in the hot summer months, and there’s the issue of finding an appropriate, vinyl-and-hot-weather-approved paint.
So we’ve come full circle. It gets more interesting soon, I promise.
So once I had done all the necessary research (aka 25hrs researching paint certifications and acrylic formulas) and decided that yes, this was a good decision for me, I set to work trying to find examples of people painting their vinyl windows black, what paints they used, and began the process of trial and elimination.
In Jess’s blog post, she was able to paint her interior windows black, using a custom mix from Sherwin Williams. Her paint technician promised with 2 coats of a dark blue paint, it would look black. So I decided I would try the same thing. I screenshotted her paint recipe, took it to MY Sherwin Williams paint guy, who was astonished paint recipes were even a thing, and custom made me a quart ($14).
Let me tell you, I’m glad I just ordered a quart of the stuff because it was GREEN. I’ll admit I held a lot of hope on this mix, because not only did it work for Jess, but her windows looked AMAZING . I just wanted black windows sooo bad. But no, my little piece of PVC tester pipe looked dark greenblue. It was a bummer, but I went back to work for a true black paint.
In my second experiment, we tried using an exterior spray paint, the Rust-oleum Protective Enamel. This came at a recommendation from my local Orschelns, who insisted it was a great exterior paint, could stick to anything, and was very long lasting. You know what’s funny? This $5 can of paint was actually pretty good 😀 However, it was flat matte, and I was looking for satin. I set this in the ‘last resort’ pile.
While researching, I made an effort to call all the paint stores in town, and see if they could recommend me anything. “I’m looking for a black, vinyl safe paint, do you know of anything?” After several you-shouldn’t-paint-your-vinyl-windows-black lectures, and after the Rust-oleum experiment, my search led me to the Home Depot paint counter, more specifically, Kevin.
Dearest Kevin, you’re my brand new paint dealer, and I love ya man, I really do.
Kevin listened to my request, and instead of mansplaining what I already knew, he was helpful and friendly. As it turned out, Kevin had just painted his exterior windows black, and used Behr Marquee
Behr Marquee was perfect for my project. It’s 100% acrylic enamel, has built-in primer properties which meant it would stick to my vinyl, and is known for it’s durableness. Kevin even sold me the gallon for the quart price of $29, and recommended we use a paint sprayer at 10% water dilution for optimal application. Thanks Kevin 🙂
After purchasing the perfect paint, I prepped the windows using Frog Tape and newspapers to cover the glass, then proceeded to use 150 grit sandpaper and roughened up the slick vinyl edging. The sandpaper was super gentle and didn’t leave any scratches, but gave the paint a more gritty surface to stick to.
Frog tape! Works a lot better than the blue painters tape
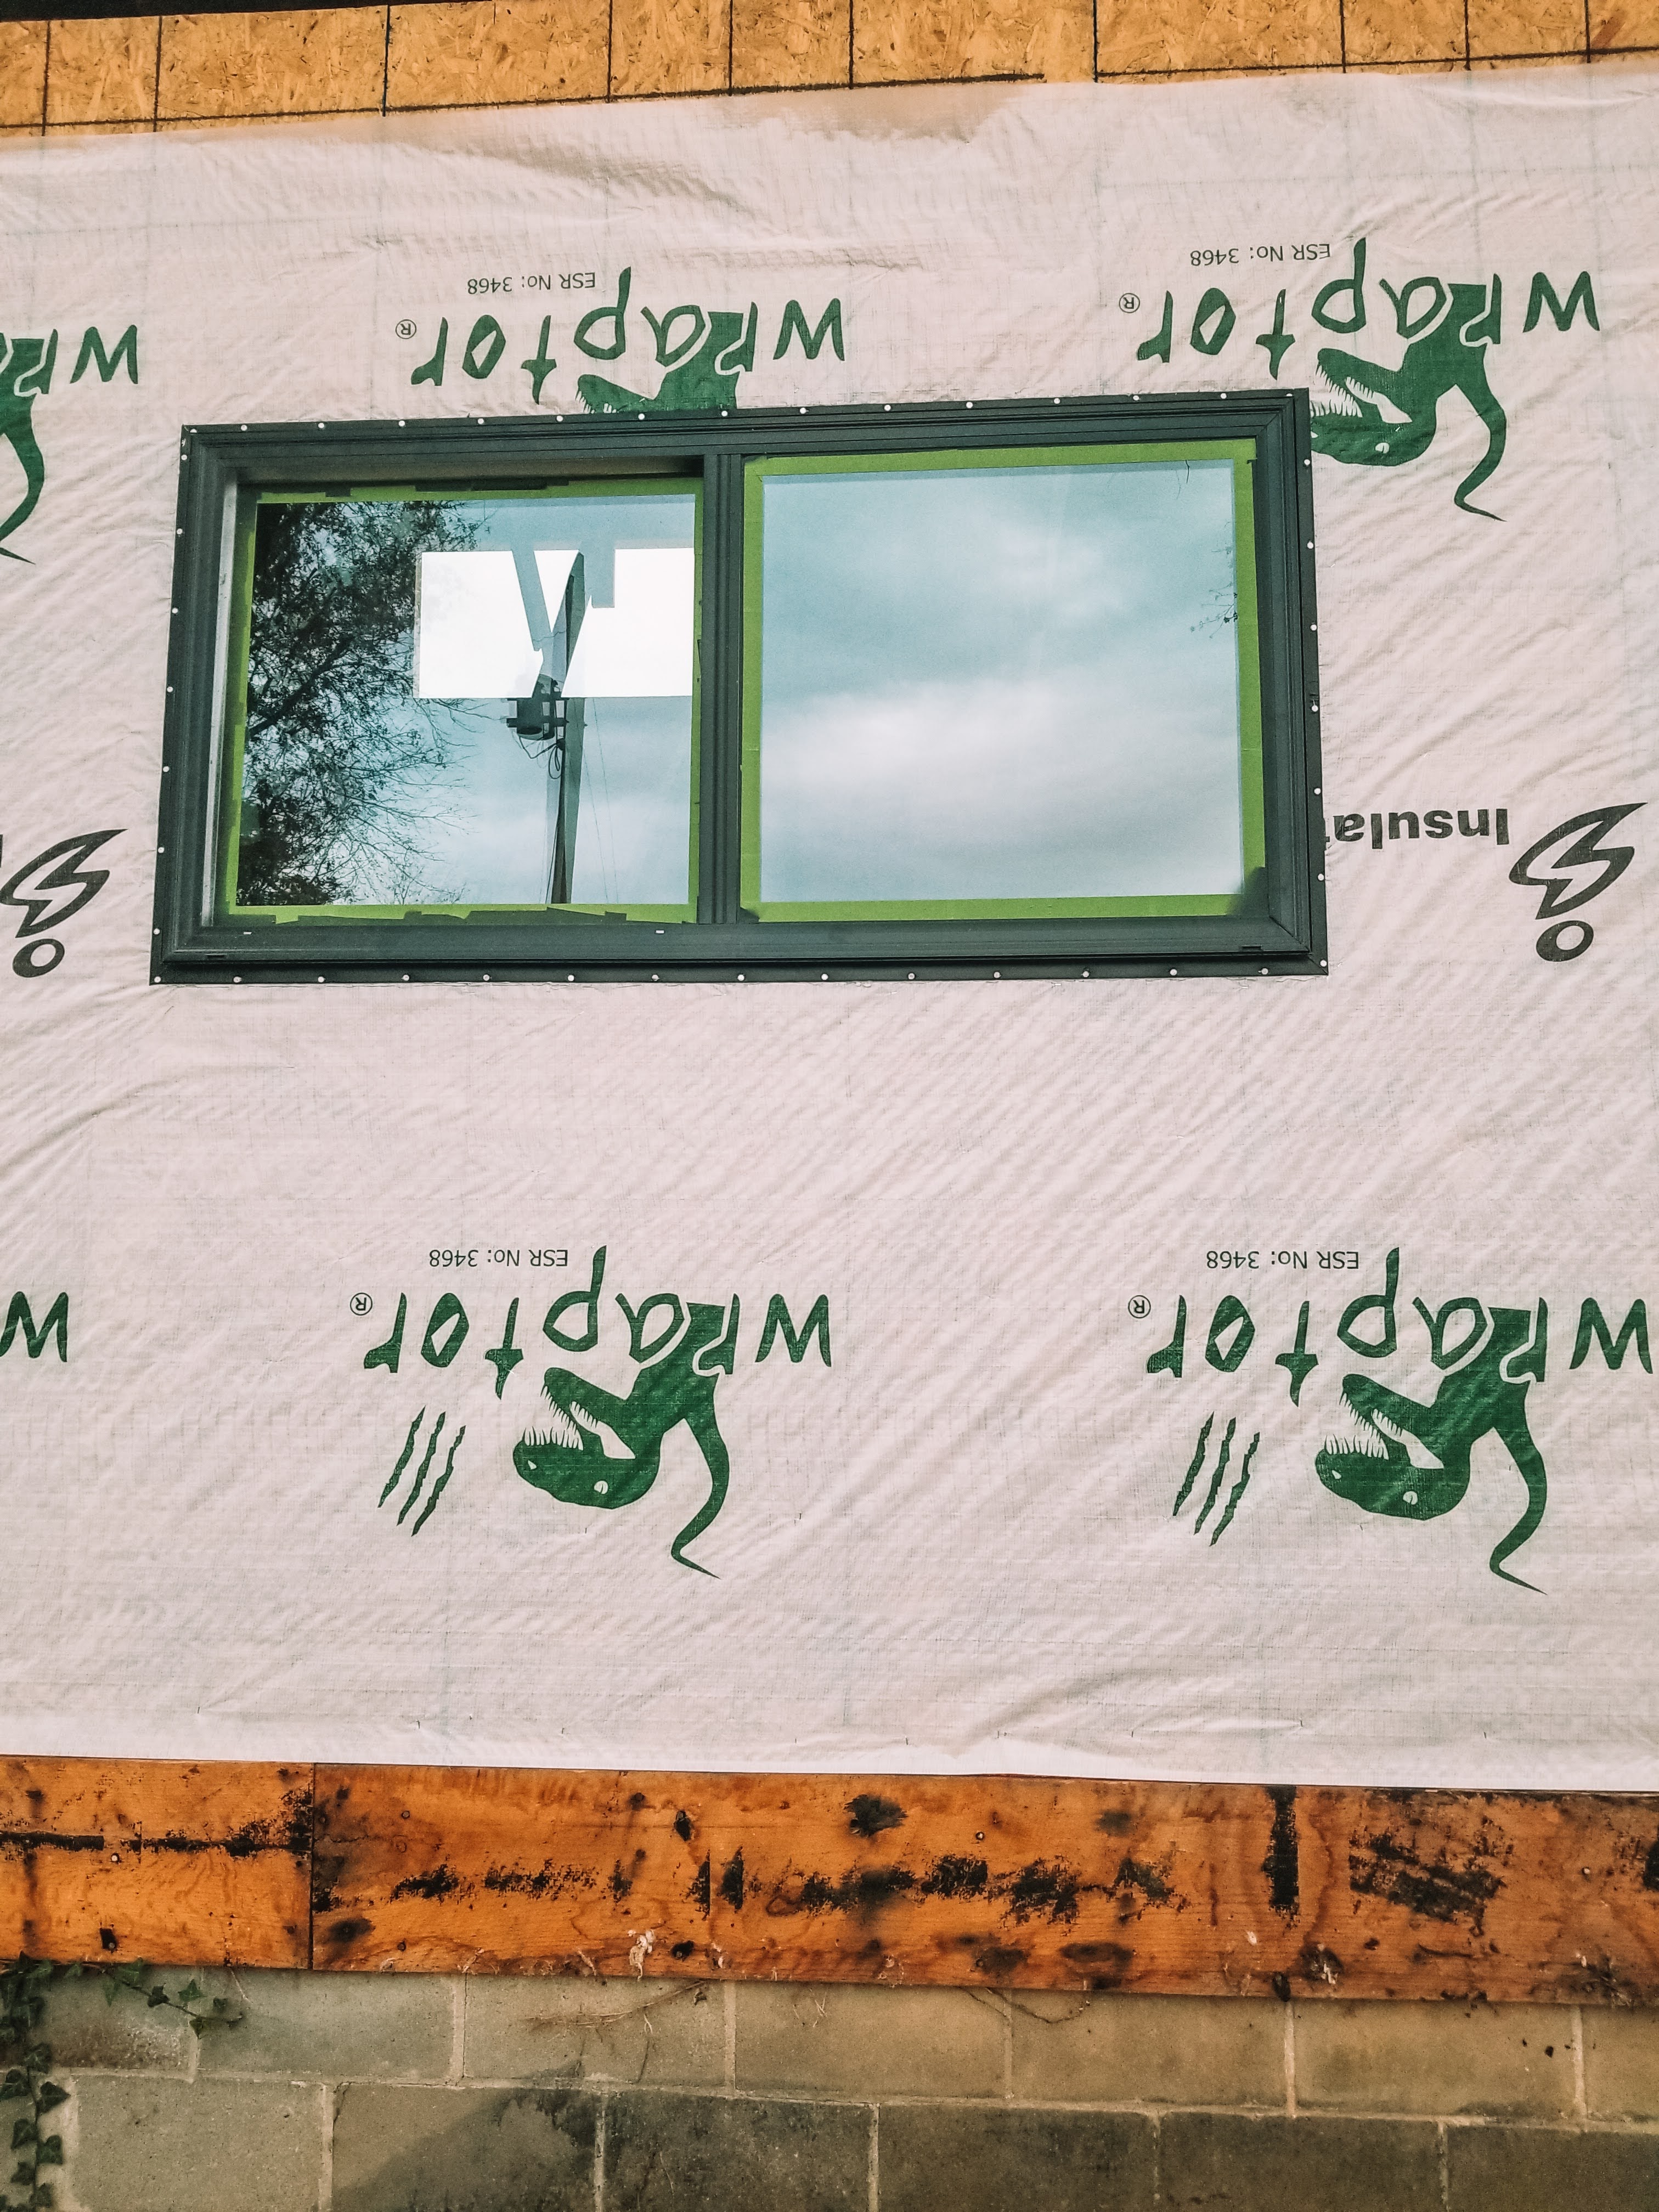
Such a contrast between the white and black, I love how bold the black windows look!
The first completed black window! Such a smart, clean look.
After mixing up the 10% water solution, Dad used his paint sprayer (here’s a similar one) and was able to spray on the paint in a thin, solid coat. I’m already expecting them to be scratched upon installation, but plan on going back and hand touching up any scratches when the build is completed.
All in all, I’m SO happy this part of the tiny home project is over and done with. It was so much more research than I had ever expected, and while there are some risks involved with painting vinyl windows, I am well informed of them, and still believe it to be worth the risk. I am too cheap to pay an extra hundred fifty per window for them to come in black, and am super proud of myself for finding a cheaper alternative.
If you made it this far, thanks for reading! If you tackle the window painting project, please let me know how it goes, and hopefully this information was entertaining and helpful! Check the pic below for a sneak peek of the next post!
**Disclaimer** I’m not responsible for any warping, flexing or shattering of painted windows. I knew the risks that came with this decision, and encourage you to do your own research before starting. If you’re looking to paint your windows any other color besides black, I’d definitely recommend the Sherwin Williams vinyl safe paint line! They have a ton of colorful options 🙂
A few years ago, I became hooked on Tiny Home videos, where hosts such as Bryce Langston (Living Big in a Tiny House) gave tours of various tiny homes and alternative living spaces throughout the world. I was fascinated by the idea of owning less so I could live more – many of you who know me in person know it has always been a dream of mine to travel the world. With travel usually costing a pretty penny, I always figured those were dreams for retired Sarah, I-finally-made-it Sarah, Sarah with grown kids and a wealthy husband. Sugar Daddy who?
But this concept of tiny, minimal living, makes it seem like the average Joe can afford lavish vacations and exotic holidays. FYI I don’t have a college degree, more on that later, and I don’t have a Sugar Daddy (yet, still working on that though, storytime tomorrow?), so money is usually always tighter over here. Not complaining though, because I’m an excellent penny pincher and am happy with where I’m at. I know I live a blessed life compared to many.
So for years I considered and researched the Tiny Home Lifestyle. I had dreams of white shiplap and no rent payments and Tahiti tours, until quite recently, when I decided to take those dreams and turn them into my reality.
Fast forward to March of 2020. I’m quarantined in my parents house, after making the decision to move out of my city townhome and back to the country, and have my eye on their outbuilding, “The Woodshed”.
The Woodshed is currently being used as a storage facility, think crates of childhood toys, camping gear, various lumber and spare siding bits, desks, box TV’s, golf clubs; various remnants of past lives, all crammed into this 11x24ft building. I began looking at the building in a different light – could this, maybe, *possibly* be turned into something more? Is she sturdy, is she safe?
I pondered this idea for months. I calculated how much it would cost to transform this shelter into a home, would it end up saving me money or costing more than it’s worth? Was it possible to hook up to the properties water and electric lines? How much of the work could be completed DIY style? And did I even want to live so close to my folks?
By May, I had decided that yes, this project would save me money in the long run. If I put what I was normally spending on rent at my townhome into this conversion, it would pay for itself in a year. A $10,000 home, not to shabby right? I realized that yes, it would be possible to hook up to water and electric. That most of the work would be able to be completed by my dad and I. And yes, I didn’t mind living on the same property as my family. I’ve always been fond of community-style living, not to mention my family are my most favorite people to be around. And I’m sure they would appreciate the extra help with managing the property.
End of May, I proposed my idea to my dad, who to my surprise, agreed to the plan, for all the reasons already discussed. The one person I was kind of nervous discussing this with was in full agreement, and already excited. He mentioned that he had been wanting to turn the woodshed into something, but he had no ideas as to what. We both agreed the tiny home will be the perfect addition to both our lives.
So that’s it! That’s the *official* beginning to this tiny home journey, and I can’t WAIT to see where it takes me, not to mention where this blog goes from here.