Hiking the Pinnacles in Mid-Missouri

Every year on April 5th, my little sister Emily and I make the trek around the main loop of the Pinnacles. We always have such a blast, that I wanted to share this hidden gem with ya’ll! While this trail is definitely not for the faint of heart – in some places you’re shuffling forward one foot in front of the other, hand on the rock wall to your right – it’s an enjoyable challenge with beautiful view. So if you find yourself in mid-Missouri and are up for a hiking challenge, I’d recommend checking this one out!

Located about 15 miles north of Columbia on Hwy 63, the Pinnacles are a 77 acre limestone cliff playground for adults and kids alike. There is ample parking, picnic benches and a shelter, as well as access to the creek and numerous hiking trails. The trail isn’t well marked, if at all, so getting to it can be kind of tricky. From the parking lot, follow the East Road, right after the foot bridge ends you’ll see a trail cut into the woods, that’s the starting point! The path meanders across a creek and along the base of the hill before climbing upwards for a quarter of a mile.

Once you’re to the top of the hill, the trail levels out and follows the ridgeline for another quarter-ish of a mile. 
At this point, the well marked trail turns and basically stops, but the hike continues along/behind the large rock formations. This is the tricky part, as the rocks are slippery, there aren’t any railings or marked paths, and falling is easy (4/5/21 I fell while transitioning from one rock to another, 10/10 wouldn’t recommend). However, the views are BEAUTIFUL. It’s so rewarding climbing to the top of a formation, and being greeted by a beautiful view. We always enjoy sitting down, having a snack, and stay for an hour soaking in the sunshine.

The trail finishes off by picking up at the base of the rock formations, crossing the creek, and leading up the embankment to get back to the parking lot area. While the creek is barely knee high, be sure to watch your step, as the rock bottom is very slippery and uneven.

While Missouri isn’t exactly ‘known’ for it’s hikes, there are plenty of hidden gems if you know where to look! Now to recap what I’ve learned the past two years hiking at the Pinnacles…

Difficulty 

The Pinnacles is a solid 3/5 stars on the difficulty charts. And by ‘the’ I mean ‘mine.’ For an avid experienced hiker, this may be on the easier side. For someone who is new to hiking and outdoor exploring, the rocky formations might be a little difficult. The perfect moderate hike

What To Wear

Tennis shoes or hiking boots with good tread, footwear you don’t mind getting wet! I’d also recommend wearing long pants – you can see above how Emily and I prefer leggings. I’ve seen poison ivy growing alongside the trail, plus long pants protect your legs against scrapes and scratches. If hiking in the early spring/fall, make sure to wear layers up top, as the upper formations can be pretty breezy.

What To Bring

Emily and I are big fans of a hiking backpack with our waters and protein bars, but you can also make the trip without a pack!

Location

The Pinnacles, Rocky Fork Township, MO 65255

If you’ve ever hiked out at the Pinnacles, or around central Missouri in general, be sure to leave a comment down below so we can share trails!

A Recap of March and April

Gooooooood morning!!

Whew. May 18th already?! Wowza. 

I have been absent from my blog duties, once again; I realized I have an obsession with taking on new hobbies, but never working past the beginning stages of excitement, but I’m hoping, needing, to continue with this. If anything, writing and documenting this journey helps ease my worries and fears and self doubts about this whole thing.

It’s a process. Anyways.

Last tiny home blog post, I discussed installing the metal sheeting and windows. Today, we’re covering all of the small adjustments and changes made to the house in March and April; updates that don’t necessarily deserve their own post, but need to be covered regardless.

Let’s start with March.

  • We didn’t start working outside until the middle of March, because even with a space heater going, the building was only 12 degrees
  • Purchased and installed a door – I went with a left inswing, full lite, pre-primed steel door, which will later be painted to match the windows
  • Also learned how to install a door knob – I purchased this one from Menards
  • We built a sliding platform (used four 2×6’s and 2 sheets of OSB) in-between the two lofts, which enabled us to place my can lights and finish the carriage bolting on my rafters
  • I cut down a sapling tree and stripped the bark off it – plan on using this as the railing on my storage stairs
  • We installed the lower level outlet and switch boxes

End of March, I placed an ad on Facebook Marketplace looking for an electrician to come do some work. The tiny home did have power, but the breaker box in the basement was 80 years old, and there was only one working outlet in the building. An entire overhaul was necessary not only for electrical home purposes, but for safety reasons as well. 

However. 

After hiring a local team of guys, one of whom was the county inspector back in 2005, and getting a quote from them, we realized it needed so much more than a trench and a few underground power lines.

Per the county, 

  • The internet, gas and electrical lines had to be flagged around the property, which involved contacting, scheduling, and having those technicians out
  • We needed to have the three telephone poles bringing power to the property replaced
  • Those new telephone poles needed new transmitters and all new cabling 
  • Then, the electricians had to come in and install 2 new electrical boxes to the main power pole
    • Box 1 is responsible for running 200 amps over to the big house, box 2 is running 200 amps over to the tiny house, and eventually, to dad’s workshop
  • Step 2 for the electricians involved digging a trench from the power pole to the tiny house, laying new ground wire, and installing the breaker box in the basement of the tiny home
  • Finally, the county inspector had to come out and and approve all the work that was done.

So began the process the first week of April, and although I was crazy stressed about the entire thing, I have to give it to my electricians, they were amazing! Not only did they coordinate with the electric, phone and gas technicians, but they were able to schedule the county electric and inspector (because this all had to be done the same day), they even HAND DUG the trench in the rain, as it was too wet to get a digger to the back of the property. 

The scheduling process took the first three weeks of April, and the entire property was fully updated and back to functioning by April 26th.  

This was the last bit of outdoor work that needed to be completed before work could start on the inside of my house, and I am SO GLAD IT’S OVER.

While I’ve learned so much about home construction, project managing and budgeting, I’ve also gained quite a few gray hairs and became pretty stressed, irritable and quite most of the time. Writing and sharing about my blog, or my tiny home Instagram, or just talking about this journey in general almost became a burden, because while I AM excited and happy about it, I never imagined how much of an emotional strain it would be.

By no means do I know what I am doing. There are no guides or rulebooks, there isn’t a local community of like-minded, DIY tiny home individuals I could meet and share and plan with. Every little aspect of this build, every hour of research, had to be done as I went along, and most of the time I didn’t even know what to google for. 

It is for those reasons, and many others, that make me more than ready to begin working on the inside of my home. Insulation I can do. Learning and helping dad hook up outlets and switches and can lights I can do. I can sheetrock and paint and decorate and build confidently. I am excited to “pull my weight” more and not rely so heavily on contractors or my dad to do majority of the work. The gray hairs were worth it, and I’ll wear them with pride, but I’m ready to start working and enjoying the process again. 

Speaking of working inside, I decided on a flooring! The tiny home before it was a tiny home, was an old storage shed on my parents property, you’ll remember it used to look like this. The current floor is the original white oak that was harvested and milled on property 80 years ago by the original farm owners, and though it is currently covered in dust and dirt, I was able to patch sand and test an area that will be covered up by my kitchen cabinets.

Clear sealant on the left, walnut stain on the right

The left swatch is the original floor using a clear sealant. You can see the old saw marks, and although it is still dirty (you see that floor, don’t come for me), I think the natural wood look is beautiful. Very rustic cabin-esque. That honey gold really brightens and warms up the space.

The swatch on the right is the patch test of a walnut gel stain when I was attempting to color match my future walnut exterior, which didn’t live up to expectations. Note to self, walnut stain on oak wood doesn’t match the old walnut wood. Duh. And while I do like the chocolate brown color of the walnut-stained-white-oak, I’ve decided to go with the left option. I feel better about leaving the nostalgic original, and think it will be a much cheaper option.

Also, I’m back to working full-time in office! This introverted homebody was pulled, almost regretfully, away from working at home, so that’ll be a whole nother set of gray hairs coming in. You know Covid was fun when you question if you  remember how to get dressed every morning in something other than leggings and a sweatshirt LOL

Well, that’s all for now. Later this week I’ll be discussing all things insulation and electric wiring – we’re so close to sheetrock and painting, eek!!

Celebrating My 1 Year Health Journey

Hi friends!

I hope everyone is having a wonderful week, and that your 2021 is going well.

Today’s post is a little more personal than the typical tiny home content; today I’ll be writing about how I took my health into my own hands, and completely changed my life for the better.

My one year anniversary with working out on a semi-regular basis was April 5th, 2021. This date is so significant because it marks one year of saying “I’m going to do this” and I actually did it! I’ve always been a huge procrastinator when it comes to working out; so saying yes to something new and scary at the time, and sticking with it, makes me unbelievably proud of myself.

April 5th I joined the Sculpt You program; I had been seeing advertisements on it for awhile, and thought maybe it’s what I needed. So I joined, and started doing the ‘Home’ workouts with my little sister, Emily. Surprisingly, we actually enjoyed them, and continued with it all the way to the middle of June.

June and July I fell off. I was going through one of my depressive funks, started working on my house more, and just in general didn’t want to make the physical effort and time commitment to work out. It wasn’t a priority at the time.

But then I decided to do a fitness challenge (work out 6x week for a month) and I completed it! I was so proud of myself for starting and sticking; I even saw results and wrote about that experience here.

After that All of Me August challenge was over, I told myself something that would keep me more consistent, was to get a gym membership. Mind you, this whole time I had been working out in a spare bedroom at my parents house, affectionately nicknamed “The Yoga Studio” aka storage/craft/workout room. I somehow convinced myself that by purchasing a gym membership at my local Rec Center, I would be pushed financially to continue working out. I thought I needed the gym expense as motivation.

Little did I know.

Little did I know how afraid I was of getting red faced and sweaty in a public space. Little did I know how self-conscious I was of my fat rolls exploding out of my leggings. Little did I know about the numerous pep talks my mom would give me; she’d vocally push me to go, even got her own membership and would go with me when she could.

Little did I know that after my first successful week at the gym, after going 6 days in a row, I started to enjoy it. Little did I know that ‘enjoying’ the gym as a hobby meant going 2 hours at a time because it was FUN. That I would gain an unhealthy obsession with activewear, that I would geek over learning how to perfect my form, that I would try to get my folks, my sisters, any new dates to go with me.

By the time January of 2021 came around, I was seeing massive strength improvements, my size 14 jeans no longer fit (more on that later), I could see baby arm muscles, developed a *slightly* increased cardio endurance, and felt as strong as I had ever been.

I was immensely proud of myself, and that just came from working out, not even changing my eating habits. So with the New Year passed, and summer vacations coming up, I decided I should follow in the footsteps of others around me, and try to ‘tone up’ for the summer. I wanted to look leaner and visibly see all my muscles.

Mind you, this whole time, I had been eating regularly. I learned food is fuel, so I was eating what I wanted, when I wanted. And the results were incredible. Eating food that brought a smile to my face helped develop my muscles, and even though I wasn’t eating anything special or premade or calorie conscious, I was growing muscles and getting bigger and stronger.

But then I stepped on the scale, and my world kind of tilted.

Upon starting my fitness journey, I was incredibly bloated, weighed in at 225 pounds, and looked like this.

August, I weighed myself again, weighed in at 215 lbs, and I looked like this.

snapchat-2101730817

I’ve always had a tummy pouch, but I felt like I lost so much fat, and built some muscle underneath those squishy layers. I weighed less than I did in April, and was happy here. 

Over the winter, I did what is called a ‘Bulk’, meaning I was trying to eat more calories than I was burning, I wasn’t tracking my foods, I was trying to eat extremely high protein and a lot of carbs. If ya didn’t know, those two things really give you a lot of energy, and I went **hard** over the winter. 

I was spending 2 – 3 hours a day 6 days a week for 3 months in a row at the gym. I loved it there. 

By January of 2021, after eating and doing so much, I weighed 234 pounds, and looked like this.

screenshot_20210405-100018_gallery

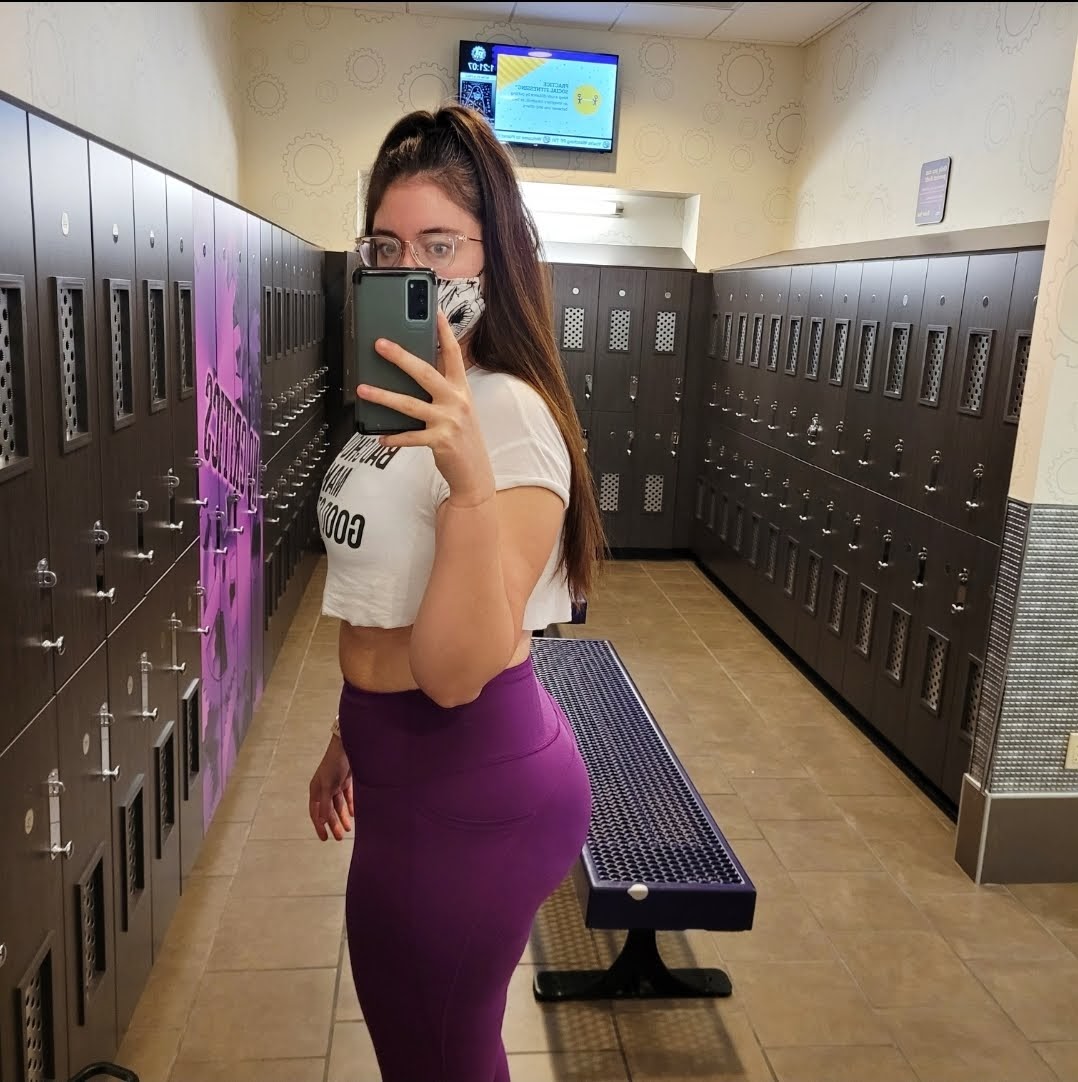
Even I, someone who has stared at this body every day for 26 years, can see the crazy changes. I HAVE ABS. I have baby arm muscles showing and I’m not even flexing. My booty is TIGHT and LIFTED, my legs are STRONG. Not to mention my posture is better and I can leg press 405 pounds.

Like I said, crazy gains considering when I started working out on a regular basis back in August of 2020, I was doing 240.

But even with all these crazy muscular changes, I am still struggling with seeing high numbers on the scale. No matter how fit and beautiful someone looks, it’s important to realize we all deal with the same internal struggles.

I see that bigger number on the scale, I look down and see my pudgy tummy that I’m convinced will never go away, I see my muscular legs that have busted out of every pair of jeans I owned, and I find myself getting sad, upset, discouraged.

Growing up, bigger numbers on the scale were a sign declaring how out of shape you were; hell even those “are you obese?” charts and graphs that are everywhere seem to be further proof that no matter how strong you are, how happy with how you look, you are an undesirable weight. I grew up with that mindset, and even though I’ve slowly been learning that maaaaybe those charts and graphs are wrong, it’s still incredibly hard seeing those numbers go up.

It’s hard enough dedicating your early mornings and late nights to a place where you go and you’re surrounded by strangers and you have set these fitness goals you want to hit so you work your ass off and foam roll yourself to death, and you see results in so many areas of your life, but then one itty bitty thing happens that didn’t go according to plan and now you feel off kilter and like you did something wrong.

So for March of 2021, I was very unhappy with the way I looked. I didn’t go to the gym hardly at all, I was beating myself up on the inside, it just didn’t make any sense!! How is it that I can have ABS that show (albeit sometimes) and I still weigh 9 pounds more than I did when I was so bloated and squishy and out of shape. How is that possible?!?

So I battled with the idea, with the possibility, that maybe growing up all those numbers and graphs were wrong. Maybe they are empty numbers that don’t measure how much is fat vs. muscle.

They certainly don’t measure my happiness or feeling of success. They are not an accurate measure of what I put into my body, because I’ll have some days where I don’t eat anything, and others where I eat super well, and others where I’m scarfing down anything sweet in sight.

Unlearning what you’ve been taught your whole life is hard really damn hard. Especially when magazine covers and commercials and Instagram ads and fitness companies are constantly pumping weight loss and diet pills down your throat.

April of 2021 has been a journey of unlearning. It’s been me not going to the gym because of a pulled calf muscle due to a hiking accident (also, more on that later). It’s been me grappling with the theory that I am so much more than a number.

Numbers don’t define me. How much I do or don’t eat doesn’t define me. How much weight I can lift doesn’t define me. What makes me, ME, are my actions in certain situations, my morals in trying times, my sense of self. That’s Sarah.

So while I’m still in love with working out, I’ve definitely taken a step back from obsessing over every little thing. I definitely celebrate my strength successes, but I’m trying to understand more that my body deserves rest and to be understood, she does so much for me.

Canva Logo

Installing the Windows and Metal Siding

Hey ya’ll!

I know I just published a post about my new metal roof, but I HAD to come right back and talk about my new metal siding!!

As I’m sure many of you know, I had made the decision to install black metal siding instead of T1-11 siding after this discovery, and boy I am sooo happy with that decision. It’s always such a relief when my choices and designs look just as good in real life as they do in my head.

Installing the metal siding was another project dad and I had plans to do ourselves, but after realizing just how precise one must be when working with metal, and after paying for the small amount we needed, we felt better hiring out. Dad and I are much more capable of doing interior jobs than exterior, and in his own words, “better to hire it out and be done with it.”

Before Derek and his team could install the siding, dad and I applied the plastic house wrap to the lower and master loft levels. Plastic wrap is pretty inexpensive, and act as another barrier between wind and rain.

With the house wrap on the lower level completed, we installed some windows! This, was a process, and definitely not OSHA approved (we’re always joking about how this whole project isn’t up to OSHA standards – too short ladders, loose nails everywhere, uneven ground, janky entrance, etc) but we got it done! I am leaving the frog tape on the windows, as I’m sure they will need a second coat once the exterior is completely done, but having the windows in makes the entire thing seem more like a home, less like a glorified shed. 

Thankfully, we were able to install the kitchen, bathroom and kitchen windows ourselves, but seeing as we don’t have a tall enough ladder to reach the second floor, Derek and his team agreed to install those upper windows for us!

Derek and his team installed the metal siding in 2 days. This included laying the aluminum underlayment (a second layer to provide further insulation and protection against the rain, the aluminum facing helps reflect sunlight. I purchased mine from the Amish), 4 upper windows, the metal sheeting, and metal trim pieces! Derek was great about explaining every little  step to us, as well as showing us how to install the future deck, and north facing walnut. 

I’m in love with it, especially seeing the before/after photos again. The transformation is incredible, not only when compared with what it looked like the day before, but even more so when compared to what the building looked like in August, when we construction started. 

Derek and his team did a great job, and they saved dad and I sooo much time and grief. We’re very pleased with the decision to hire out – DIY projects are a huge learning curve, and there’s nothing wrong with letting the professionals step in for certain tasks! 

As I am trying to be as transparent as possible with the cost of my tiny home build, the budget breakdown for the metal and labor is below!

MaterialPriceWho Paid
Metal Siding$1600Sarah
House Wrap$159Dad
Siding Installation$1450Dad
An explanation of who pays: while this is my tiny project and I am paying for the majority of the expenses, dad and I had an agreement that he would pay for the purchase of tools he didn’t already own, and would pay for something to be done professionally if he didn’t want to help me DIY it. Getting the metal siding was professionally installed, so he covered the expense. As for the house wrap, he is king of “running errands” aka purchasing small things so I won’t have to. And when I try to repay him, he says “Don’t worry about it”. I think this mostly comes down to him being protective of my finances and having a super helpful personality – I have the best dad.

So that’s it! The installation of house wrap, windows, underlayment, metal siding and trim took about a week, and while I’m very thankful for everyone who helped, I never want to do that again!

I was beyond stressed watching this team of strangers work on my precious house – even though I trusted them on the business level, I still felt like I was handing them my child with minimal instructions. I was a ball of worries that week, especially when dad and I installed the kitchen window (rickety ladder, uneven ground, huge window, PIVOT), but I am SO thankful and grateful for every minute of this process. I’ve learned so much, and I can’t wait to share more!

I hope seeing these in-depth updates is helpful, informative, and at the very least, entertaining.

See ya next time! And by next time probably tomorrow – I have sooo many small updates to share!

Sincerely,

Sarah

A New Roof

Good Mooorningggggg ya’ll!

**This post was drafted December 27th**

I hope everyone is having a wonderful Christmas week. We are 4 days out and my inner child is *slightly* freaking out. Nothing beats waking up Christmas morning and unwrapping presents, eating french toast casserole, and spending the day snuggled in front of the fire. 

Today, I’m throwing us back to before Thanksgiving, back to when I had my roof installed. Yes. My beautiful house has a beautiful roof, and she is sooo nice. 

As many of ya’ll know, I decided to install a black metal roof for multiple reasons

  1. Metal roofs are known for their durability. I don’t have the largest income, and didn’t want to worry about roof repairs and leaks down the road. They don’t corrode or crack, and per warranty you’re guaranteed 50-70 years without issues. Not that I’ll be living here for 30 years or anything, but I will be living here worry free about roof leaks.
  2. They are more environmentally friendly – although asphalt shingles are being recycled more, a metal roof provides a flat, stable platform for homeowners who want to install rooftop solar panels, and collect rainwater. I want to do both.
  3. Metal roofs are VERY energy efficient – even though I’ll be installing a mini split system for heating/cooling which is a pretty efficient system in itself, a solar heat reflecting roof will also help. During the summer, metal roofs are proven to reduce cooling costs by 25% – and as a girl who keeps her home at 68 degrees, I know my wallet will appreciate a reduced bill. 
  4. Plus they look nice and I’m a sucker for a nice looking anything

Although metal roofs are much more expensive than asphalt shingles, I’m blessed with a tiny roof. I’m finding I can afford nicer things when I don’t have much to buy in the first place, tiny home perk!

So with my decision made, dad and I purchased the roof and brought her home 3 days later. Driving in the truck with 4ft of metal hanging off was probably not the best decision, but I’m also cheap when it comes to a $150 delivery fee for a 15minute drive. Ridiculous right?!

So. With metal in hand I set to work finding someone who could install it for us. Dad and I are both scared of heights and the roof is about 20ft in the air, not to mention we have no way of getting up there, so I put an ad out on Facebook Marketplace. I received several inquiries almost immediately, and after having two people out for quotes, I hired Derek Ritter out of Brookfield, MO. Although he was two hours away, he was more than willing to do the job, and he had availabilities for that same weekend!

A day later, my roof was installed. She is black and bold, and although you can’t see much of her from the ground, I had Derek take a picture when he was up there. Doesn’t she look nice?!

I was worried we would be able to see the silver screws, but they were black as well! Score!

Now the building is *almost* waterproofed for winter, it looks great, and dad and I didn’t have to face our fear of falling off a roof to our deaths 😂😂

Anyways, thanks to everyone for sticking around. This has been quite the extensive journey, and a lot hasn’t gone according to plan, (safe to say I’m more than looking forward to working inside the house, that’s moreso where dad and I thrive) but I am looking forward to sharing the almost last bit of exterior work with you guys later this week!

Sincerely,

Sarah

Introducing My Living Room Mood Board

PNW Inspired

I’m finally sharing my living room mood board! Featuring walnut built-in’s, a forest green accent wall, Pacific Northwest inspired decor, and black pipe accents.

When designing this space, I knew I wanted something warm and comfortable, but also something dramatic and bold. I am a lover of all things eclectic, and tend to combine several different styles to create my own.

This color palette is everything. Bold reds and oranges, similar to the redwood trees in Oregon.

Rich greens and purples, not unlike the glaciers, forests and foggy valleys surrounding Mt. Rainier

June of 2020, I visited Oregon and Washington for the first time ever. I immediately fell in love with them; from the old hippies at the Eugene farmers market, to hiking in Forest Park in Portland, to the views of Mt Rainier from the Japanese gardens. Ever since that trip, the Pacific Northwest holds a special place in my heart, and I am itching to return. 

It made sense for me to return without visiting, by bringing the colors into my home, as well as decorating with PNW artwork…. bringing my memories back to life. Throw in a dash of LOTR vibes with black accents, and you have my dream living room. 

Although it is undoubtedly a small space, I plan to open it up with white walls and large windows. My main/accent wall in the space will be painted a forest green, with deep walnut built-in bookshelves. I’ll hang my TV in the place, and possibly install an electric fireplace underneath. 

Instead of artwork, my TV will be hung in the center. I really like the layout and size of these shelves, especially the cabinet storage available underneath the shelving.
This green color is BEAUTIFUL, although I’d prefer mine slightly darker and richer. Multiple throw pillows, luxe throws and the macrame textures really liven up the room.
The neutral rug and leather accents really tie in all the warm pieces, doesn’t this look like the perfect place to read a book?

Hopefully these inspiration pictures gave you a sneak peek into my eclectic brain. As you can probably tell, I LOVE dark, rich tones, and I always have. My clothing colors of choice have always been jewel and darker tones, so it’s natural my home would reflect those decisions. Book storage, a comfortable sofa and dark academia knick knacks are definitely my aesthetic, and I can’t wait to take you guys along the painting and decorating journey.

Keep close to nature’s heart…and break

clear away, once in awhile, and climb a mountain or spend a week in the woods.

Wash you spirit clean.

John Muir

Learning How to Paint Vinyl Windows

Happy Thanksgiving weekend! 🙂

I hope everyone ate until they had to unbutton the top button, surrounded themselves with family and friends, and expressed their thankfulness, in one way or another. I know I did. Although Thanksgiving looked a bit different this year with Covid keeping extended family in their respective homes, we were able to celebrate with my older sister and her boyfriend Adam. We always have such a good time cooking, eating, drinking and playing together. I find myself pausing in those moments, so thankful we all live relatively close to each other, able to enjoy each other’s company for days on end.

I wanted to finish out this wonderful Thanksgiving weekend with a blog post; when thinking of all the topics I plan to cover and where to even begin, painting my vinyl windows seems to be at the front – a fun, controversial subject. I myself am a lover of controversy, so this should be fun!

Back in July, I started researching what kind of windows I needed; their dimensions, placement locations, and any available colors. I knew I wanted black exterior windows, and that I needed 7 windows in total, and roughly where they were to be hung. Once I had figured out what was what, I was able to purchase my windows from MidCity Lumber , a local construction and building materials store here in Columbia. MidCity is known for their competitive pricing – for example, my 6x3ft window at Menards was $345. At MidCity, my total was $222. Being able to save so much per window really helped me save a lot, but even still, my total window price was $1200. Thankfully, dad has an account with MidCity, so I was able to put the window purchase on credit, and I am making payments on it every month. 

If you’re interested, these are the exact window details 🙂

One 6×3, slidingKitchen$222.35
One 3×4, slidingLiving Room$183
One 2×4, slidingBathroom$153
Two 4×2, pictureUpper Open Space$270
Two 4×2, slidingLofted Bedroom$318
Please keep in mind window prices vary greatly, these are the prices I paid for Quaker brand windows at my local construction supply store

With windows purchased and delivered, I then set to work researching vinyl safe paints, along with the pro’s/con’s of painting windows. 

Vinyl safe paints were hard to come by; most everyone is aware of the Sherwin Williams vinyl safe paint line, however, they don’t offer black pigments. That’s because vinyl flexes under heat and painting with a dark color can cause it to absorb even more heat and possibly crack/chip off. Also, painting vinyl is a tricky business in itself, and you can’t just buy regular exterior paint. Since vinyl is flexible and slick and weird – paint doesn’t want to stick to it. Vinyl is created from PVC, the same material used for gutters and pipes, and is verrrry fluid resistant. The only chance of having your exterior paint stick to the vinyl is if you get an acrylic based, or urethane-modified acrylic based paint. Acrylics are more likely to stick to the slick surface without cracking or chipping. 

Also, painting vinyl is one thing. Painting vinyl windows is a whole nother business in itself. Paint manufacturers (like the dudes behind the Sherman Williams vinyl safe paint line) will tell you yes, you can paint vinyl windows. You can paint anything, right? Well, right, except there is a different between can and should. Still with me?

So the paint guys over at the paint counter will tell you you can paint vinyl windows. However, the bros over at the window counter will strongly recommend you don’t, and for some pretty serious reasons. Painting your windows can void your home and window warranty, your windows have a higher chance of absorbing heat and shattering in the hot summer months, and there’s the issue of finding an appropriate, vinyl-and-hot-weather-approved paint. 

So we’ve come full circle. It gets more interesting soon, I promise. 

So once I had done all the necessary research (aka 25hrs researching paint certifications and acrylic formulas) and decided that yes, this was a good decision for me, I set to work trying to find examples of people painting their vinyl windows black, what paints they used, and began the process of trial and elimination. 

Google led me to Jess, over at the Bright Green Door

In Jess’s blog post, she was able to paint her interior windows black, using a custom mix from Sherwin Williams. Her paint technician promised with 2 coats of a dark blue paint, it would look black. So I decided I would try the same thing. I screenshotted her paint recipe, took it to MY Sherwin Williams paint guy, who was astonished paint recipes were even a thing, and custom made me a quart ($14).

Let me tell you, I’m glad I just ordered a quart of the stuff because it was GREEN. I’ll admit I held a lot of hope on this mix, because not only did it work for Jess, but her windows looked AMAZING . I just wanted black windows sooo bad. But no, my little piece of PVC tester pipe looked dark green blue. It was a bummer, but I went back to work for a true black paint.

20201006_162219

In my second experiment, we tried using an exterior spray paint, the Rust-oleum Protective Enamel. This came at a recommendation from my local Orschelns, who insisted it was a great exterior paint, could stick to anything, and was very long lasting. You know what’s funny? This $5 can of paint was actually pretty good 😀 However, it was flat matte, and I was looking for  satin. I set this in the ‘last resort’ pile. 

While researching, I made an effort to call all the paint stores in town, and see if they could recommend me anything. “I’m looking for a black, vinyl safe paint, do you know of anything?” After several you-shouldn’t-paint-your-vinyl-windows-black lectures, and after the Rust-oleum experiment, my search led me to the Home Depot paint counter, more specifically, Kevin.

Dearest Kevin, you’re my brand new paint dealer, and I love ya man, I really do. 

Kevin listened to my request, and instead of mansplaining what I already knew, he was helpful and friendly. As it turned out, Kevin had just painted his exterior windows black, and used Behr Marquee

Behr Marquee was perfect for my project. It’s 100% acrylic enamel, has built-in primer properties which meant it would stick to my vinyl, and is known for it’s durableness. Kevin even sold me the gallon for the quart price of $29, and recommended we use a paint sprayer at 10% water dilution for optimal application. Thanks Kevin 🙂

After purchasing the perfect paint, I prepped the windows using Frog Tape and newspapers to cover the glass, then proceeded to use 150 grit sandpaper and roughened up the slick vinyl edging. The sandpaper was super gentle and didn’t leave any scratches, but gave the paint a more gritty surface to stick to. 

After mixing up the 10% water solution, Dad used his paint sprayer (here’s a similar one) and was able to spray on the paint in a thin, solid coat. I’m already expecting them to be scratched upon installation, but plan on going back and hand touching up any scratches when the build is completed. 

All in all, I’m SO happy this part of the tiny home project is over and done with. It was so much more research than I had ever expected, and while there are some risks involved with painting vinyl windows, I am well informed of them, and still believe it to be worth the risk. I am too cheap to pay an extra hundred fifty per window for them to come in black, and am super proud of myself for finding a cheaper alternative. 

If you made it this far, thanks for reading! If you tackle the window painting project, please let me know how it goes, and hopefully this information was entertaining and helpful! Check the pic below for a sneak peek of the next post!

20201120_155018

**Disclaimer** I’m not responsible for any warping, flexing or shattering of painted windows. I knew the risks that came with this decision, and encourage you to do your own research before starting. If you’re looking to paint your windows any other color besides black, I’d definitely recommend the Sherwin Williams vinyl safe paint line! They have a ton of colorful options 🙂

Framing My Tiny Home

Hi!

It’s me, forever playing catch up on this blog – shoutout to my mom for encouraging me to keep going. “Aunt Cindy needs a blog update.”

Aunt Cindy, this one is for you 🙂

Anyways, last time we were together, we covered the roof removal. It was quite a process, of which I’m glad we won’t have to ever repeat. Destroying things and killing weeds and removing boards and hammering nails is a monotonous process; it’s safe to say I am ready for the rebuilding process. 

I’m not sure if I shared this, but I decided to hire a local contractor to frame out the building. Over the summer, I was gathering quotes and interviewing different people for the job, and after only receiving 2 of the 7 quotes I had appointments for, I decided to go with the man who did my parent’s addition 7 years ago. John Null is a local contractor out of Hallsville, and does great work quickly, and for cheap. He will customize his services to fit your budget, of which I was very thankful for; his initial quote was $2000 to frame the lofts, and in the end I paid $2400. Quite the bargain considering the second quote I received was from a company out of Columbia, who quoted me $20,000 for the same exact job. 

Anywho.

John Null came out the week before to finalize my plans and go over the hand drawn blueprints (I’m pretty cheap and didn’t want to pay an official architect person to draw something I knew dad could do), and he began work October 14th. John worked over the course of a week with his youngest son, Joseph, and saved dad and I so much worry and time. I can’t imagine where we would be if we would have had to do the framework ourselves. 

As we all know, I had purchased the lumber ahead of time because building material prices skyrocketed since the pandemic started, and I wanted to spend the least amount possible. Even still, by the time John started, we were short of a couple pieces, and had to make several late night trips to Menards for  framing studs, rafters, and OSB for the exterior. I learned how to handpick framing lumber, and can now distinguish what is useable vs what isn’t. 

With all the newly acquired lumber, John set to work.

Luckily, I was able to work from home every day he was here working, and you know I set up in the guest bedroom supervising from the back windows LOL. Nah, I had full trust in John because of my dad’s trust in him, but as a Type A personality it was very unnerving having someone come in and start messing and doing things to my project. I had fears that someone would get hurt on the worksite, that there would be communication issues and it wouldn’t be built like how I’d been dreaming, or if it would rain on my $1200 stack of lumber, (which did happen once but it was ok), that once it was finished I would stand inside and realize how S M A L L it was and maybe it was too small and can I really do this, live small?

Thankfully, it was smooth sailing, and in a week and a half, my home was framed and John was paid and nobody got hurt and it was everything I had planned, and in fact, it’s actually bigger than I had imagined. It doesn’t feel tight or tiny at all!

20201017_110137
My bedroom loft with the roof lined out!


20201015_160515
Dad and John finalizing plans.. The oak rafters from the roof removal were reused as X cross braces! Cross braces are used to stabilize the building until all the windows and exterior are done.


20201022_160855
The view standing in the living room looking upwards


20201024_163951
Standing in the living room, looking into my bedroom loft.


20201024_164018
Standing in the kitchen, looking up towards my 2nd loft – the guest space/home office. Dad always being a cheese.


20201028_173350

Isn’t it wonderful?!

The north side, looking straight on in the picture above, sits at 15ft, and the south side is 13ft. We opted for a ‘shed’ style roof, where it all slopes in one direction. Shed style roofs are easy to install, easy to walk, not to mention with mine sloping towards the south, it will catch alllll the sun. I hope to install solar panels on the roof next summer, as well as a rainwater catchment system. It’s my ultimate goal to be completely off grid – using solar for all my power, and filtered rain for my water. I have a lot to learn until then *excited nervous face*

Anywho. 

This post is long overdue, but super exciting. Although I have been making regular Tiny Home updates to my Facebook and tiny home Instagram account – find me @sarahstinyhome –  I’m trying to be better with blogging it as well. Blogging is a highly detailed account of this journey, and I know I’ll want to remember all the little things down the road. 

One last thing to cover in this post, the cost of this build. 

  • $2400 – Payment to John
  • $1200 – Framing studs – Menards
  • $116 – Last minute 2x4x8’s – Menards and LaCrosse Lumber
  • $1385 – Rafters, OSB and Facia – MidCity Lumber

The total to have my Tiny Home framed out was $5,101

Yea. Itsa lot. But it was worth every penny spent, so I’m not mad. Just kinda like ._. everything’s fine :S

This might be my longest post to date, but I did receive requests for longer, more in depth posts, so you’re welcome 🙂

If you made it this far, thanks for sticking with me through this journey, and supporting this process. Thanks to Taylor and Amber for understanding my hectic schedule, thanks to my parents for letting me stay with them, thanks to my dad for being the BEST work partner I could have asked for, thanks to my sisters for understanding why I’m tired and kinda grouchy, thanks to my coworkers and boss for being understanding with scheduling, and thank you to all my friends, family, and complete strangers who are interested and stay excited. I love ya’ll.

Roof Removal!

Hello all, and welcome to another episode of I’m-so-stressed-and-busy-I-forget-to-update-my-blog-on-time!

The last time I wrote on here, we covered the discovery of the walnut wood, and I shared my exterior design plans. That was about the only progress made on the tiny home over the course of September – a lot of small projects of course, but none to write about. Only in the past month have several large projects been started, of which we will start the catch up game in this post.

As we all know, or maybe you don’t if you’re new here (Hi! I’m Sarah Burkhardt, and I’m flipping an 11×24 shed on my parent’s property into a tiny home) the roof on the shed had to be removed so we could frame out the lofts and put on a new roof. Dad and I knew this would be a tremendous, all day project, but luckily a few family friends pulled through and made it much more manageable, let alone enjoyable.

Shout-outs in advance go to Tom and Adam for helping us tear off the roof, and to Roger for lending us his trailer to cart all the shingles and trash to the dump. We could not have done this project without your assistance.

At the beginning of October, I was fortunate enough to schedule my contractor John Null to start the framework on October 15th. Dad and I knew we had to get off the roof before then, so we picked October 10th as Roof Removal day. Tom and Adam showed up early that Saturday morning to begin ripping the shingles off. Dad had only expected there to be two layers of shingles on the roof – turns out there were 6!! 6 layers of shingles, about 5,000lbs on the roof of the building, of which we scraped off the roof, onto the ground, and then from the ground into a nearby parked dumpster. 

After we removed all the shingles and carted the dumpster to the dump (thanks Roger!) we started removing the oaken roof that was acting as the underlayment to the shingles. 

Originally, Adam and dad were on the roof attempting to pry the boards off the rafters, but quickly realized they were getting nowhere. It would have taken SO much longer, so we compromised. Adam stayed on top of the building prying off the boards from the south end, and dad and I used 2×4’s from the inside, hitting upwards and knocking off the north side boards. 

Once that top layer was gone, it was pretty easy to saw off the rafters, as well as the sagging front ‘porch’ and the southern eaves. 

After 9 hours of work, the roof was finally removed! All 4 of us shed some blood, received multiple splinters and knocked heads, and stepped on nails, but thankfully no serious injuries were received. And it was pretty satisfying to see the after, compared to the before that morning. 

We were able to get SO much done in such a small amount of time, and it’s times like these where I am truly thankful for all the friends my family has, an extended family that I can always count on. 

We Have Walnut!

Goodmorning all! Today’s post is a pre-written post from the end of September – to be honest I had forgotten about this draft, and as things are progressing quite quickly on the house, I wanted to get his out there for timeline purposes. Enjoy!

Hey y’all!

Another tiny home update coming at you – today we’re discussing all things exterior design!

When dad and I were discussing exterior design plans over the summer (again, hey if you’re new here! My dad is acting foreman of this project as he has much more construction knowledge than I do – I’m the design and budget manager, he’s the building foreman. It’s a great partnership and I’m so thankful we work well together!) and were throwing around ideas of using T1-11 siding on the exterior, finished with the Shou Sugi Ban charring effect. However, we knew before we decided on a plan exactly, we needed to test out the charring and made sure it fit my design ideas. 

So we made the trek over to Menards, spent $33 on an 8×4 piece of T1-11, brought it home and cut off a section of it. Dad used his weed blower (essentially a miniature flame thrower, shit is pretty cool) to char the exterior layer of the T1-11. And boy, it did not go to plan. 

Per several Google searches and YouTube videos, we believed our charred wood would turn out like this 

She’s rustic, beautiful, cozy. Instead, our T1-11 siding did not take the heat very well, and we ended up with this zebra striped ugly ass shit

I was pretty upset when the T1-11 siding plan fell through – why do the professional DIYers on the YouTube world make it look so easy? Why does mine look nothing like theirs? I could have gotten lost in my frustrations, but dad had an idea to pull off a piece of oak siding and run it through the planer. We had no idea what was underneath 70 years worth of weathering, stain and paint. Turns out, it was a gold mine. 

Turns out, the assumed oak exterior was in fact walnut. Walnut!! Can you believe it?! For those who don’t know wood, walnut is used primarily in furniture building; it runs about $15/ft at our local sawmills, and is slow growing and rarer than other types of lumber, like oak or pine. And I have a whole building sided with the stuff! Pretty unbelievable, and a definite blessing. 

Upon removing the few boards we used for the experiment, I went ahead and popped off all the walnut siding. Thankfully, I was able to complete this project in a day  – as for hammering out all the nails, that’s a constant project. Spare hour? Hammer some nails.

With our newfound discovery, dad and I began brainstorming for a new exterior look. I really like the look of deep wood and black metal, and began pulling inspiration from other tiny houses around the web. I love the modern cottage look of the below, and would love to create something similar. 

I love the black metal and wood mixture on these, and am hoping to create the same on mine. I will use the majority of the walnut on the northern side – the side where my door and big kitchen window are. The rest will be repurposed on the interior as built-in bookshelves, countertops, bathroom vanity, and stair treads. 

Another detail you might have seen in the inspiration pictures above, are the beautiful black windows, a stark yet stunning contrast to the pale wood. As you may remember from my last post, I already have windows, WHITE windows. When I started this tiny home journey, I knew I wanted black windows, however they are astronomically higher priced than white ones, so I decided to DIY paint my white ones black. 

Stay tuned for my next post to see the process behind painting my white vinyl windows black! 

And yes, it can be done 😉

Sincerely, 

Sarah